This week I was fortunate enough to have a relatively clear night to test out my “new-to-me” Pentax K-1. I say relatively clear because I had some factors working against me.
First, the humidity levels in the atmosphere over Wisconsin have been very, very high. When that happens, even on clear nights, you need to slightly lower your expectations on what your results will be. Humidity and heat distort light and can create issues for astrophotography.
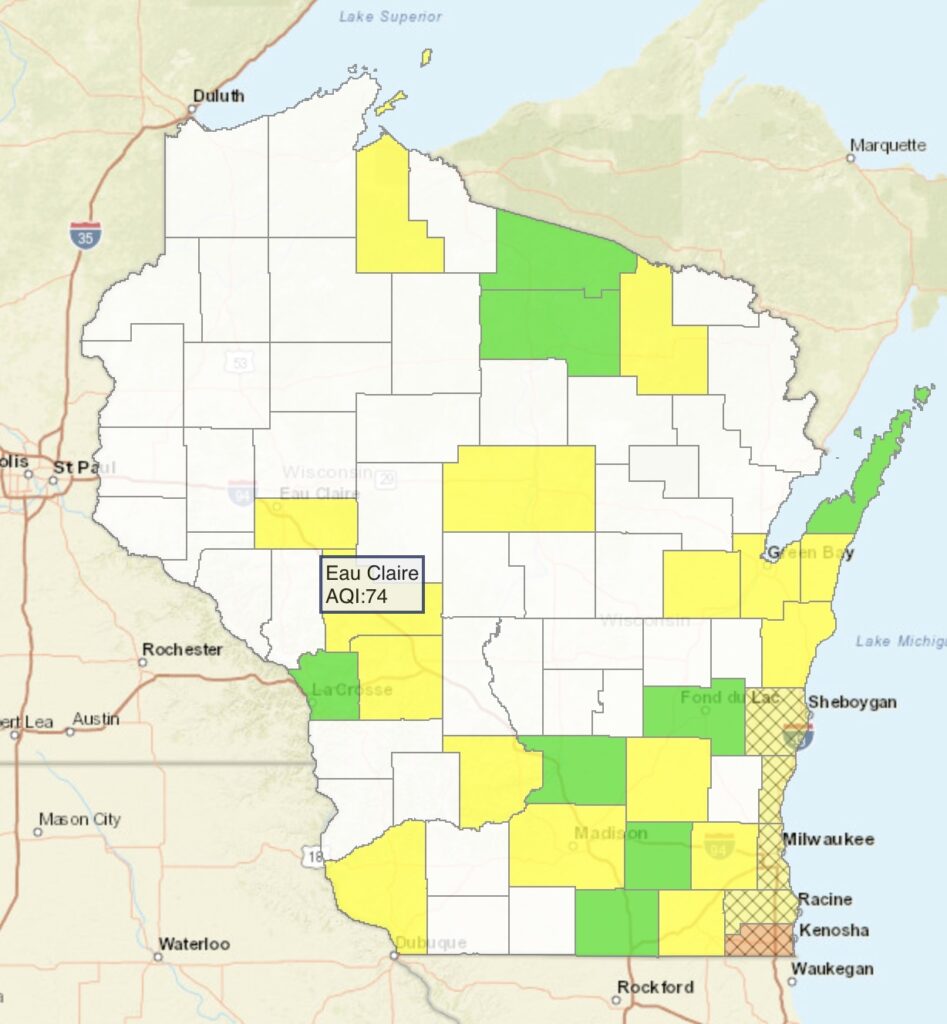
Second, Wisconsin has been dealing with wildfire smoke as of late. Today (Monday, July 14, 2025) the forecast has improved. However, the past two days the air quality in Eau Claire has bounced back and forth between unhealthy for vulnerable populations and just downright unhealhty.
I always feel a twinge of guilt when I feel frustration on sunny days with wildfire smoke. I always try to have my astro-nerd tendencies take a back seat to the people and wildlife impacted by these fires.
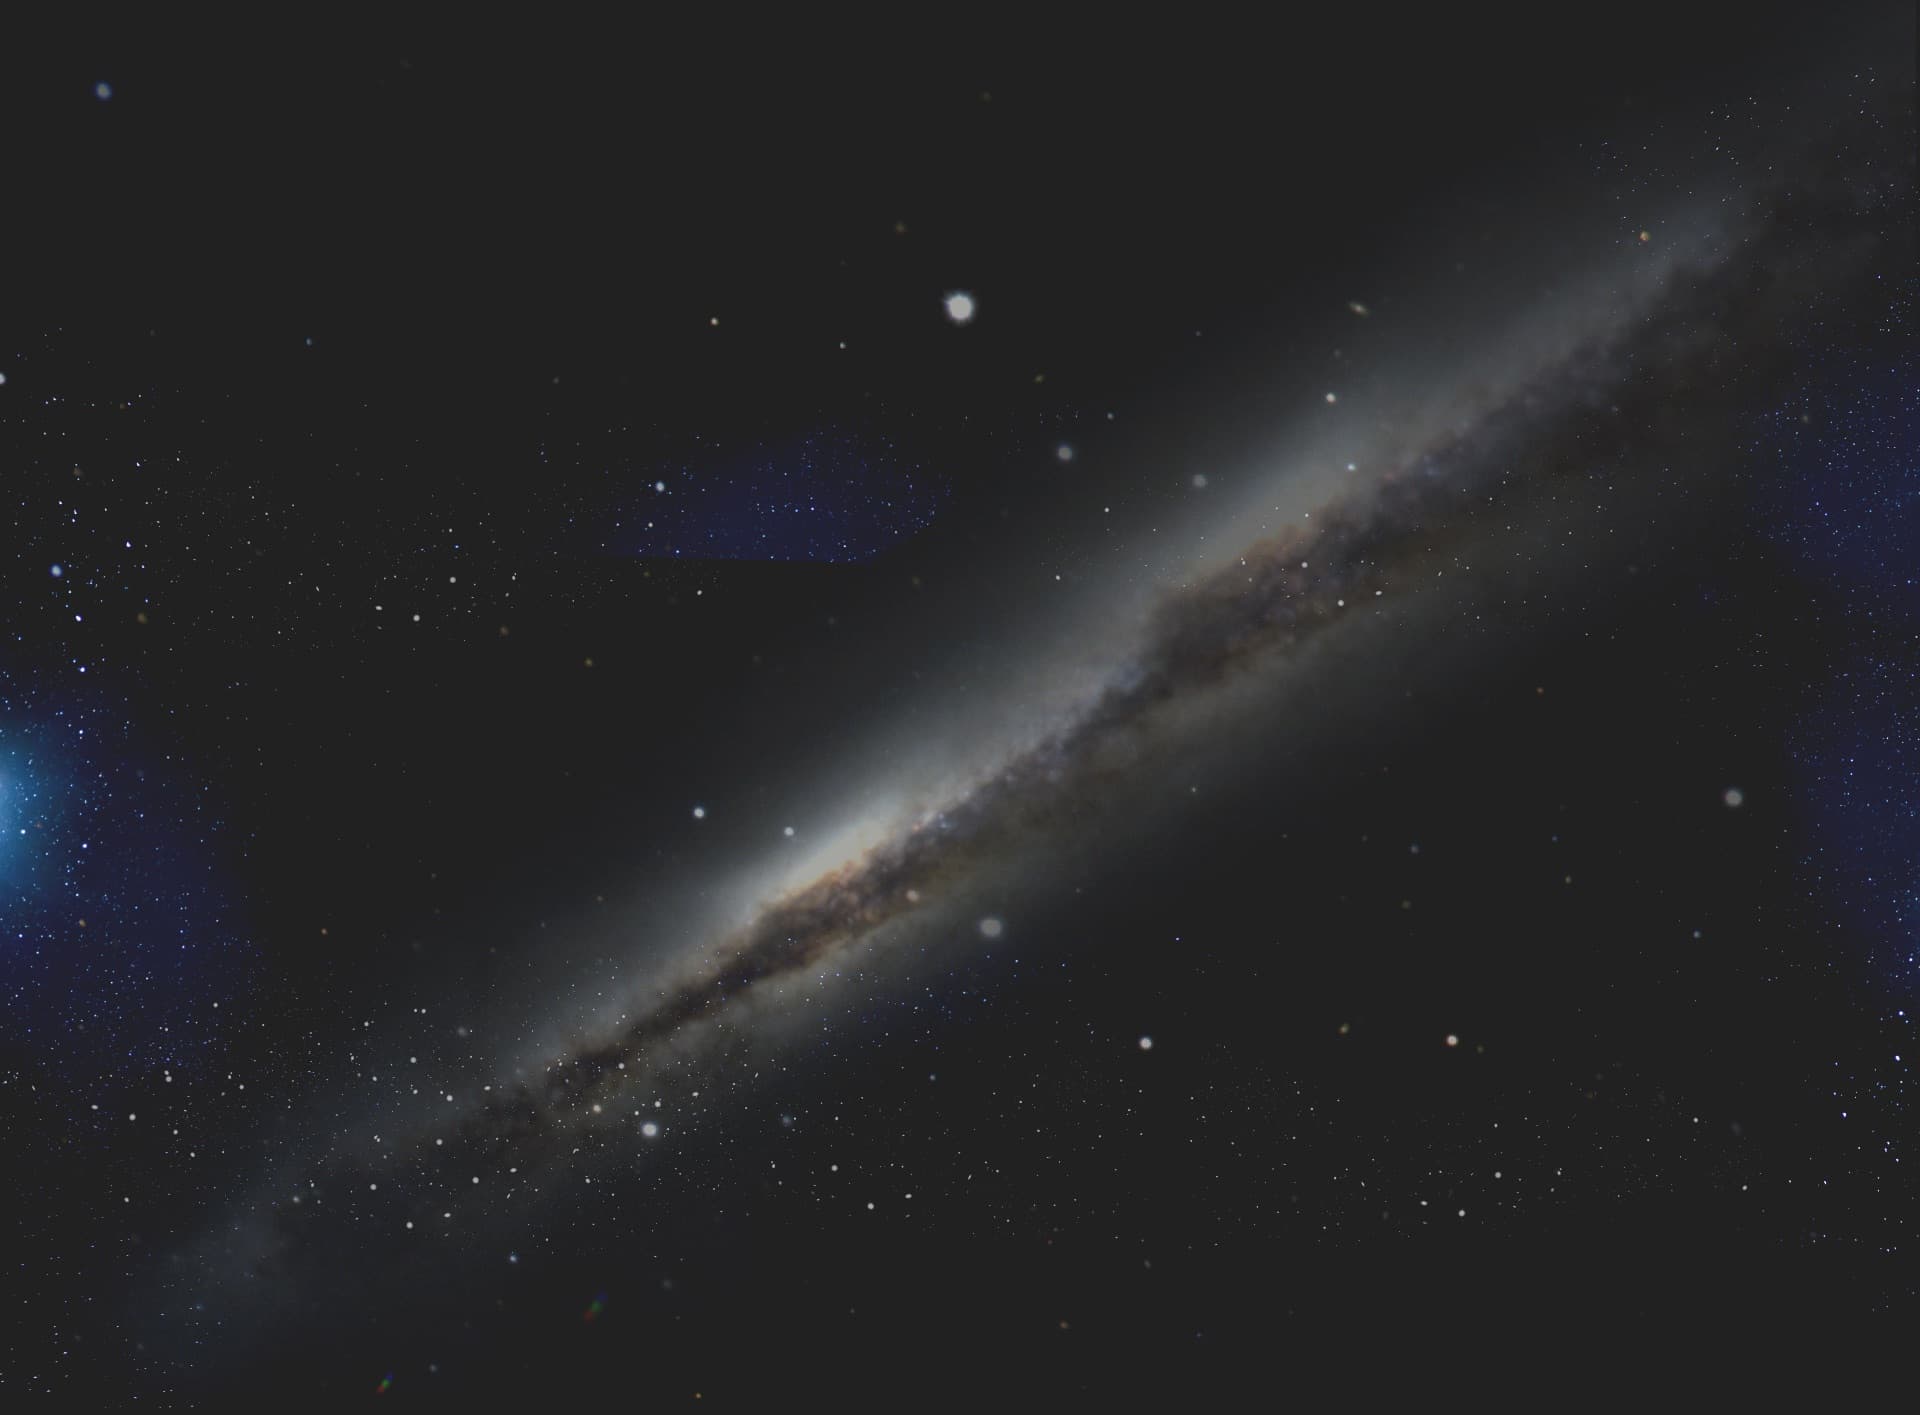
Lastly, since we are just coming off a full Moon, I only had about 30 minutes of good time to image a deep space object before Moonrise. So, how did my Pentax K-1 astrotracer do? To summarize it in a word, “brilliant!!” Last night I decided to do some slightly more serious astrophotography. The target again was the Rho Ophiuchi Complex. This time, however, I used a “longer lens” to capture this image. I used my Irix 150mm f/2.8 Macro lens. I love this manual lens because of how sharp its rendering is with no issues with color fringing. Color fringing is that effect you get with old lenses that can create a purple or green hazy outline on bright parts of your picture. This effect is very frustrating in astrophotography and difficult to fix.
I had the astrotracer pre-set in my camera and took my first test image to see how long the sensor would rotate before stars would trail. The camera suggested I take one minute and 55 second exposures. I tried a couple test images and I could tell a soft breeze was creating micro-jitters in my camera – images were a little blurry. So, I adjusted it to one minute exposures. Result – pin sharp images!!!!
Just as a reminder, this sensor rotation technology is really quite amazing. When an astrophotographer takes a tripod image of the night sky, they figure out how long they can expose the sensor of their camera by using either the rule of 300 or the rule of 500. What you do is take one of those numbers, divide them by the focal length of your lens and that’s how long (typically) you can open your shutter before you get star trailing. I prefer the rule of 300 – it just seems I always get nice round stars with 300 while 500 is hit and miss. Therefore, 300/150 = 2 seconds for your maximum exposure. To be able to extend that time to an entire minute is really quite amazing!
Since my time was limited and I had a little “futzing” with test shots, I ended up with 20 usable images!! I then used the astrophotography image stacking software in Affinity Photo (its kinda like photoshop), normalized the white balance, and this is what I got!!!
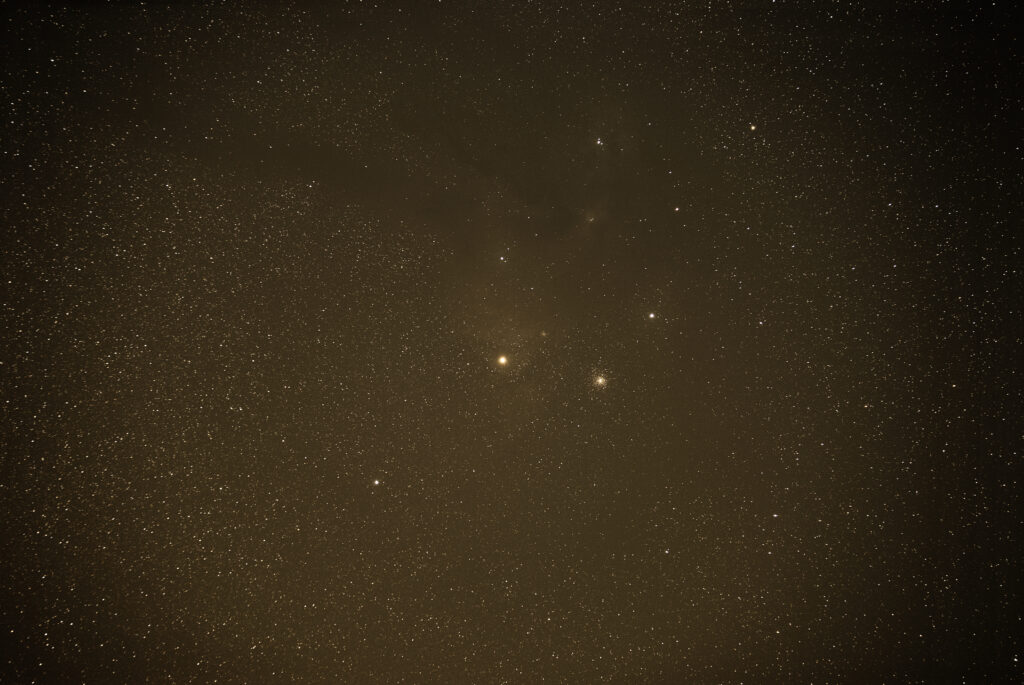
Looks great doesn’t it!!!! Or… well… something’s wrong… it’s brown. Welcome to what wildfire smoke (and pollution) can do to astrophotography. As you know, I have and will be writing about care for creation on this blog. This image should be a flat image with the night sky’s natural colors. Instead, its a visual reminder of how delicate our environment is and our need to care for it. Natural wildfires happen and are needed. The ones that happen at our own hands are sinful. Both types can threaten both our health and the health of the world around us. Please, take seriously our call to care for creation.
Now, as is the case with astrophotography, you can always alter colors and try to “get the dust out” or at least hide it. I took a few stabs at it and this is the best I could do.
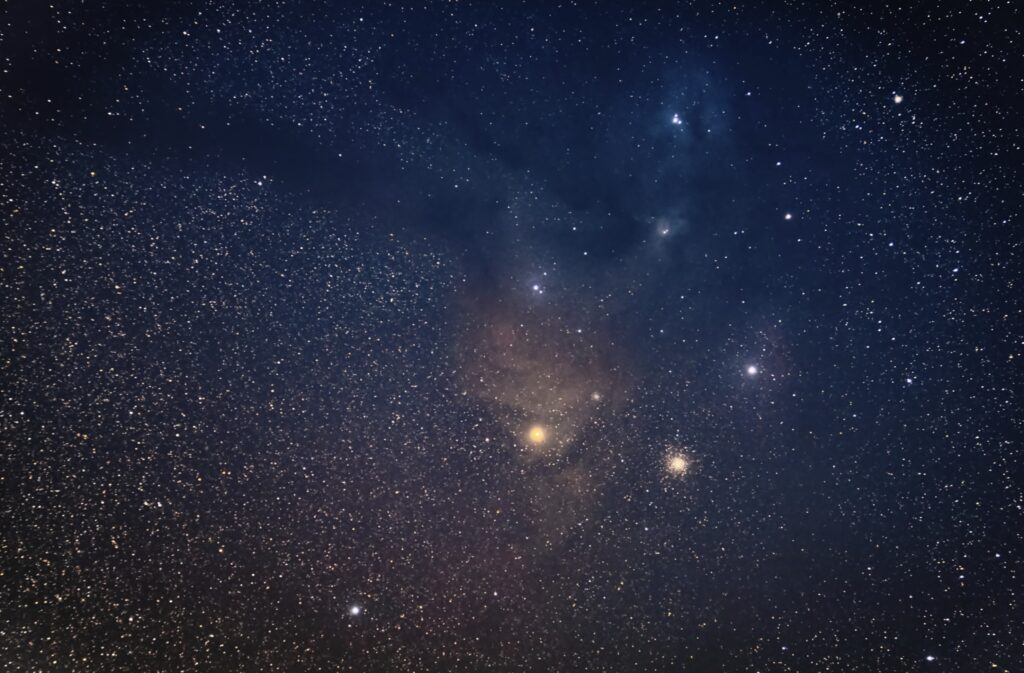
How do I feel about it? Very, very good! With the challenges the night presented, I can’t help but think that this was more than what I was expecting. Now that I know how to most effectively use the astrotracer tool, I can get out of “test mode” and move into education and story telling mode. Even this image, if I were still teaching high school astronomy, would be a wonderful image to explain the different types of objects in the Rho Ophiuchi Complex.
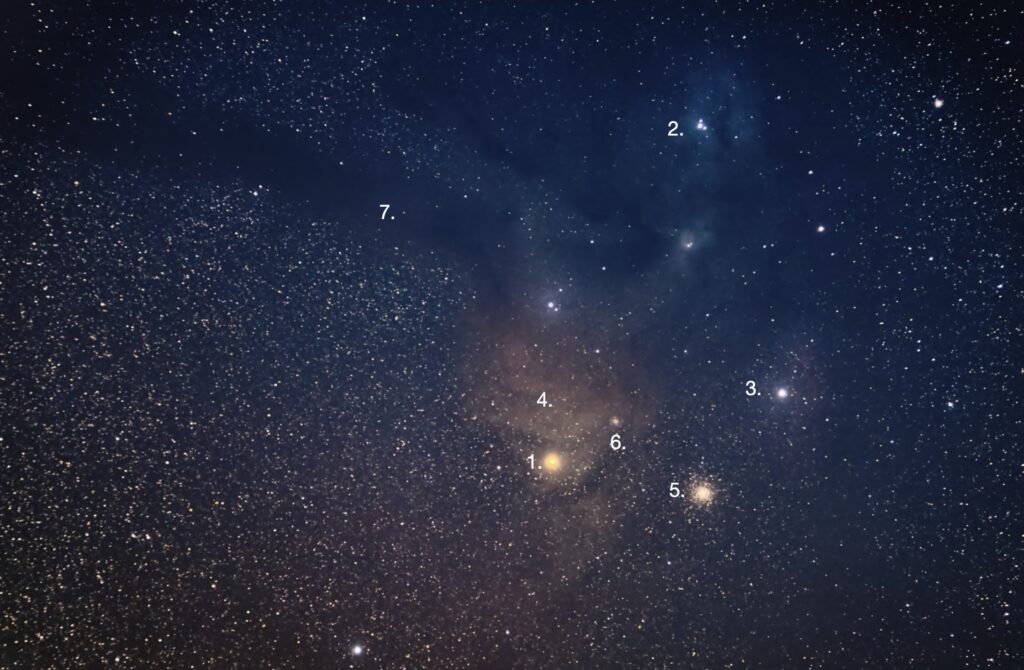
- Antares – Red Giant Star – but looks yellow because of gold nebula.
- R Scorpii – Blue Star
- Alniyat – Blue Star surrounded by a pinkish emission nebula – a place of star birth.
- The unique “gold nebula” that is reflected light from neighboring stars.
- Messier 4 – A globular clusters of stars
- NGC6144 – A far fainter star cluster close to Antares
- Dark Nebulae Barnard 44 (45 got cropped out…. douh!) A dust cloud that neither emits or reflects light. It is also known as an absorption nebula since light doesn’t pass through it.
I could see this image being a constant return point to discuss different types of stars, clusters, nebulae, star birth, star death and many other things. In many ways, this complex contains many of the wonders that are taught in the classroom. Its wonderful when a simple image taken on a less than ideal night can spark so much creativity and wonder in me.
So, am I happy with my “trade/purchase” of the Pentax K-1? Very much so!! Now – Enough reviewing and time for some fun!
Happy Monday!